目录
1.idea创建项目
创建步骤 :File --> New --> project,,,-->Spring initializr-->选择项目所需要的架包
项目创建完成后可以查看pom.xml文件,上面选择的的第三方组件已经加入到pom.xml中了。
pom.xml:
<dependency> <groupId>org.mybatis.spring.boot</groupId> <artifactId>mybatis-spring-boot-starter</artifactId> <version>2.1.1</version> </dependency> <dependency> <groupId>mysql</groupId> <artifactId>mysql-connector-java</artifactId> <version>8.0.30</version> </dependency>打开application.properties文件
#端口号 server.port=8080 #指定上下文路径 server.servlet.context-path=/ #指定url编码 server.tomcat.uri-encoding=utf-8打开application.properties文件
#驱动 spring.datasource.driverClassName = com.mysql.cj.jdbc.Driver #数据库连接 spring.datasource.url = jdbc:mysql://127.0.0.1:3306/db_text?characterEncoding=utf-8&serverTimezone=UTC&useSSL=false #用户名 spring.datasource.username = root #密码 spring.datasource.password = 123456mybatas-plus配置
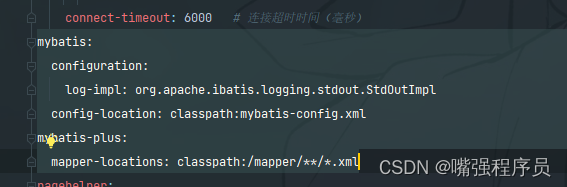
打开application.properties文件
#mybatis核心配置文件 mybatis.config-locations=classpath:mybatis-config.xml #mybatis xml配置文件的位置 mybatis.mapper-locations=classpath:/mapper/**/*.xml #在控制台输出执行的sql语句 mybatis.configuration.logimpl=org.apache.ibatis.logging.stdout.StdOutImplmybatis-config.xml文件内容:
<?xml version="1.0" encoding="UTF-8"?> <!DOCTYPE configuration PUBLIC "-//mybatis.org//DTD Config 3.0//EN" "http://mybatis.org/dtd/mybatis-3-config.dtd"> <configuration> <settings> <setting name="logImpl" value="SLF4J"/> <!-- 开启二级缓存 --> <!--<setting name="cacheEnabled" value="true"/>--> </settings> <!-- 别名 --> <typeAliases> <typeAlias alias="Integer" type="java.lang.Integer" /> <typeAlias alias="String" type="java.lang.String"/> <typeAlias alias="Long" type="java.lang.Long" /> <typeAlias alias="HashMap" type="java.util.HashMap" /> <typeAlias alias="LinkedHashMap" type="java.util.LinkedHashMap" /> <typeAlias alias="ArrayList" type="java.util.ArrayList" /> <typeAlias alias="LinkedList" type="java.util.LinkedList" /> <!--<typeAlias type="com.zking.test.model.Book" alias="Book"/>--> </typeAliases> <!-- 分页插件 --> <plugins> <plugin interceptor="com.github.pagehelper.PageInterceptor"> </plugin> </plugins> </configuration>在启动类上加入如下注解: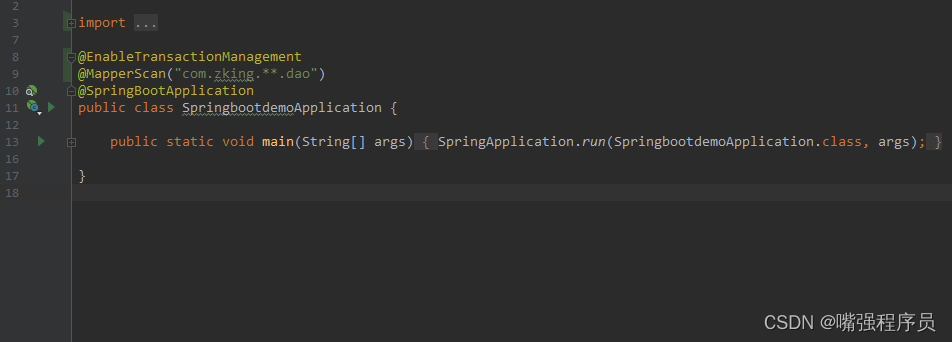
在需要进行事务管理的类或方法上加入事务注解就可以了(@Transactional)
<dependency> <groupId>org.springframework.boot</groupId> <artifactId>spring-boot-starter-aop</artifactId> </dependency>-
pom.xml
<dependency> <groupId>com.github.pagehelper</groupId> <artifactId>pagehelper-spring-boot-starter</artifactId> <version>1.2.12</version> </dependency>2)application.properties
# -------------------- pagehelper B --------------------------- pagehelper.helper-dialect= mysql #pagehelper.reasonable=true #pagehelper.support-methods-arguments=true #pagehelper.params=count=countSql # -------------------- pagehelper E ----------------------------
将课件提供的PageBean.java, PagingInterceptor.java,
1.定义注解
package com.example.springboot1.annotation; import java.lang.annotation.ElementType; import java.lang.annotation.Retention; import java.lang.annotation.RetentionPolicy; import java.lang.annotation.Target; /** * @author L * @site www.xiaomage.com * @company xxx公司 * @create 2022-06-10 9:10 */ @Retention(RetentionPolicy.RUNTIME) @Target(ElementType.METHOD) public @interface Paging { }2.定义切面
package com.example.springboot1.aop; import com.example.springboot1.utils.PageBean; import com.github.pagehelper.PageHelper; import com.github.pagehelper.PageInfo; import org.aspectj.lang.ProceedingJoinPoint; import org.aspectj.lang.annotation.Around; import org.aspectj.lang.annotation.Aspect; import org.springframework.core.annotation.Order; import org.springframework.stereotype.Component; import java.util.List; /** * @author L * @site www.xiaomage.com * @company xxx公司 * @create 2022-06-09 16:15 */ @Component @Aspect @Order(1) public class PagingAOP { //@Around("execution(* com.zking.mybatisdemo..*.*Page(..))") @Around("@annotation(com.example.springboot1.annotation.Paging)") public Object around(ProceedingJoinPoint point) throws Throwable { Object[] args = point.getArgs(); PageBean pageBean = null; for(Object arg: args) { if(arg instanceof PageBean) { pageBean = (PageBean)arg; if(pageBean != null && pageBean.isPagination()) { PageHelper.startPage(pageBean.getPage(), pageBean.getRows()); } } } Object rv = point.proceed(); if(pageBean != null && pageBean.isPagination()) { PageInfo info = new PageInfo((List)rv); pageBean.setTotal(Long.valueOf(info.getTotal()).intValue()); } return rv; } } 3.定义分页工具类
package com.example.springboot1.utils; import com.mysql.cj.util.StringUtils; import javax.servlet.http.HttpServletRequest; import java.util.Map; public class PageBean { /** * 页码 */ private int page = 1; /** * 每页显示的记录数 */ private int rows = 10; /** * 总记录数 */ private int total = 0; /** * 是否分页 */ private boolean pagination = true; /** * 记录查询的url,以便于点击分页时再次使用 */ private String url; /** * 存放请求参数,用于生成隐藏域中的元素 */ private Map<String,String[]> parameterMap; /** * 根据传入的Request初始化分页对象 * @param request */ public void setRequest(HttpServletRequest request) { if(!StringUtils.isNullOrEmpty(request.getParameter("page"))) { this.page = Integer.valueOf(request.getParameter("page")); } if(!StringUtils.isNullOrEmpty(request.getParameter("rows"))) { this.rows = Integer.valueOf(request.getParameter("rows")); } if(!StringUtils.isNullOrEmpty(request.getParameter("pagination"))) { this.pagination = Boolean.valueOf(request.getParameter("pagination")); } this.url = request.getRequestURI(); this.parameterMap = request.getParameterMap(); request.setAttribute("pageBean", this); } public int getPage() { return page; } public void setPage(int page) { this.page = page; } public int getRows() { return rows; } public void setRows(int rows) { this.rows = rows; } public int getTotal() { return total; } public void setTotal(int total) { this.total = total; } public boolean isPagination() { return pagination; } public void setPagination(boolean pagination) { this.pagination = pagination; } public String getUrl() { return url; } public void setUrl(String url) { this.url = url; } public Map<String, String[]> getParameterMap() { return parameterMap; } public void setParameterMap(Map<String, String[]> parameterMap) { this.parameterMap = parameterMap; } //计算起始页码 public int getStartIndex() { return (this.page - 1) * this.rows; } //获取总页数 public int getTotalPage() { if (this.getTotal() % this.rows == 0) { return this.getTotal() / this.rows; } else { return this.getTotal() / this.rows + 1; } } //上一页 public int getPreviousPage() { return this.page - 1 > 0 ? this.page - 1 : 1; } //下一页 public int getNextPage() { return this.page + 1 > getTotalPage() ? getTotalPage() : this.page + 1; } }4)集成结束,可以编写测试方法进行测试
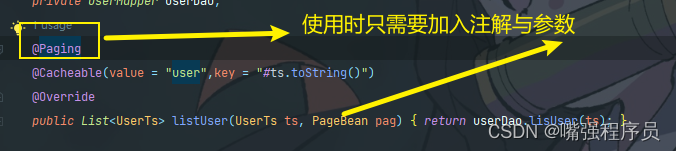
然后调用方法测试即可
注意此处 ,如使用两次界面 paging需要在最上方 否则失效
阿里开源的数据库连接池,使用java开发,提供强大的监控和扩展功能,可以替换DBCP和C3P0连接池,性能要比其他的连接池要好。 1)pom.xml
<dependency> <groupId>com.alibaba</groupId> <artifactId>druid-spring-boot-starter</artifactId> <version>1.1.21</version> </dependency>-
application.properties
#--------------------- druid config B ------------------------ #config druid spring.datasource.type=com.alibaba.druid.pool.DruidDataSource #初始化时建立物理连接的个数 spring.datasource.druid.initial-size=5 #最小连接池数量 spring.datasource.druid.min-idle=5 #最大连接池数量 maxIdle已经不再使用 spring.datasource.druid.max-active=20 #获取连接时最大等待时间,单位毫秒 spring.datasource.druid.max-wait=60000 #申请连接的时候检测,如果空闲时间大于timeBetweenEvictionRunsMillis,执行validationQuery检测连接是否有效。 spring.datasource.druid.test-while-idle=true #既作为检测的间隔时间又作为testWhileIdel执行的依据 spring.datasource.druid.time-between-eviction-runs-millis=60000 #销毁线程时检测当前连接的最后活动时间和当前时间差大于该值时,关闭当前连接 spring.datasource.druid.min-evictable-idle-time-millis=30000 #用来检测连接是否有效的sql 必须是一个查询语句 #mysql中为 select 1 #oracle中为 select 1 from dual spring.datasource.druid.validation-query=select 1 #申请连接时会执行validationQuery检测连接是否有效,开启会降低性能,默认为true spring.datasource.druid.test-on-borrow=false #归还连接时会执行validationQuery检测连接是否有效,开启会降低性能,默认为true spring.datasource.druid.test-on-return=false #当数据库抛出不可恢复的异常时,抛弃该连接 #spring.datasource.druid.exception-sorter=true #是否缓存preparedStatement,mysql5.5+建议开启 spring.datasource.druid.pool-prepared-statements=true #当值大于0时poolPreparedStatements会自动修改为true spring.datasource.druid.max-pool-prepared-statement-per-connection-size=20 #配置扩展插件 spring.datasource.druid.filters=stat,wall #通过connectProperties属性来打开mergeSql功能;慢SQL记录 spring.datasource.druid.connection-properties=druid.stat.mergeSql=true;druid.stat.slowSqlMillis=500 #合并多个DruidDataSource的监控数据 spring.datasource.druid.use-global-data-source-stat=true # WebStatFilter配置,说明请参考Druid Wiki,配置_配置WebStatFilter #是否启用StatFilter默认值true spring.datasource.druid.web-stat-filter.enabled=true spring.datasource.druid.web-stat-filter.url-pattern=/* #经常需要排除一些不必要的url,比如*.js,/jslib/*等等 spring.datasource.druid.web-stat-filter.exclusions=*.js,*.gif,*.jpg,*.png,*.css,*.ico,/druid/* #Druid内置提供了一个StatViewServlet用于展示Druid的统计信息 #设置访问druid监控页的账号和密码,默认没有 spring.datasource.druid.stat-view-servlet.enabled=true spring.datasource.druid.stat-view-servlet.reset-enable=false spring.datasource.druid.stat-view-servlet.login-username=admin spring.datasource.druid.stat-view-servlet.login-password=admin #DruidStatView的servlet-mapping spring.datasource.druid.stat-view-servlet.url-pattern=/druid/* #允许列表,只有配置在此处的ip才允许访问durid监控平台 spring.datasource.druid.stat-view-servlet.allow=127.0.0.1 #拒绝列表,配置下此处的ip将被拒绝访问druid监控平台 spring.datasource.druid.stat-view-servlet.deny= #--------------------- druid config E ------------------------application.yml配置
spring: datasource: url: jdbc:mysql://ip:port/数据库?serverTimezone=UTC&useUnicode=true&characterEncoding=utf8&useSSL=false username: root password: driver-class-name: com.mysql.jdbc.Driver type: com.alibaba.druid.pool.DruidDataSource druid: #初始化大小 initialSize: 5 #最小值 minIdle: 5 #最大值 maxActive: 20 #最大等待时间,配置获取连接等待超时,时间单位都是毫秒ms maxWait: 60000 #配置间隔多久才进行一次检测,检测需要关闭的空闲连接 timeBetweenEvictionRunsMillis: 60000 #配置一个连接在池中最小生存的时间 minEvictableIdleTimeMillis: 300000 validationQuery: SELECT 1 FROM DUAL testWhileIdle: true testOnBorrow: false testOnReturn: false poolPreparedStatements: true # 配置监控统计拦截的filters,去掉后监控界面sql无法统计, #'wall'用于防火墙,SpringBoot中没有log4j,我改成了log4j2 filters: stat,wall,log4j2 #最大PSCache连接 maxPoolPreparedStatementPerConnectionSize: 20 useGlobalDataSourceStat: true # 通过connectProperties属性来打开mergeSql功能;慢SQL记录 connectionProperties: druid.stat.mergeSql=true;druid.stat.slowSqlMillis=500 # 配置StatFilter web-stat-filter: #默认为false,设置为true启动 enabled: true url-pattern: "/*" exclusions: "*.js,*.gif,*.jpg,*.bmp,*.png,*.css,*.ico,/druid/*" #配置StatViewServlet stat-view-servlet: url-pattern: "/druid/*" #允许那些ip allow: 127.0.0.1 login-username: admin login-password: 123456 #禁止那些ip deny: 192.168.1.102 #是否可以重置 reset-enable: true #启用 enabled: true-
pom.xml
<dependency> <groupId>org.springframework.boot</groupId> <artifactId>spring-boot-starter-data-redis</artifactId> </dependency>-
application.properties
# -------------------- redis config B ------------------------- # Redis数据库索引(默认为0) spring.redis.database=0 # Redis服务器地址 spring.redis.host=192.168.0.24 # Redis服务器连接端口 spring.redis.port=6379 # Redis服务器连接密码(默认为空) spring.redis.password= # 连接池最大连接数(使用负值表示没有限制) spring.redis.jedis.pool.max-active=100 # 连接池最大阻塞等待时间(使用负值表示没有限制) spring.redis.jedis.pool.max-wait=-1ms # 连接池中的最大空闲连接 spring.redis.jedis.pool.max-idle=10 # 连接池中的最小空闲连接 spring.redis.jedis.pool.min-idle=0 # 连接超时时间(毫秒) spring.redis.jedis.timeout=1000 # -------------------- redis config E -------------------------yml文件配置
redis: database: 1 host: 120.79.61.66 # Redis服务器地址 port: 6379 # Redis服务器连接端口 password: 123456 # Redis服务器连接密码(默认为空) jedis: pool: max-active: 200 # 连接池最大连接数(使用负值表示没有限制) max-wait: -1 # 连接池最大阻塞等待时间(使用负值表示没有限制) max-idle: 10 # 连接池中的最大空闲连接 min-idle: 2 # 连接池中的最小空闲连接 connect-timeout: 6000 # 连接超时时间(毫秒)-
编写一个controller用于测试
/** * 用于测试redis集成 * @author Administrator * @create 2019-12-1822:16 */ @RestController public class RedisTestController { @Resource private RedisTemplate redisTemplate; @RequestMapping(value = "/redis") public Object redis() { String name = "redis test"; redisTemplate.opsForValue().set("redisTest", name); Map<String,Object> map = new HashMap<>(); map.put("code", 1); map.put("msg", "操作成功"); return map; } }可以通过postman进行测试,如果正常在redis中添加key,则说明集成成功。
配置文件中需要写入redis基本配置
redis: database: 1 host: 120.79.61.66 # Redis服务器地址 port: 6379 # Redis服务器连接端口 password: 123456 # Redis服务器连接密码(默认为空) jedis: pool: max-active: 200 # 连接池最大连接数(使用负值表示没有限制) max-wait: -1 # 连接池最大阻塞等待时间(使用负值表示没有限制) max-idle: 10 # 连接池中的最大空闲连接 min-idle: 2 # 连接池中的最小空闲连接 connect-timeout: 6000 # 连接超时时间(毫秒)手动配置后 利用json进行转换 所需架包
<!-- 导入解析 Json的包 --> <dependency> <groupId>com.fasterxml.jackson.core</groupId> <artifactId>jackson-databind</artifactId> <version>2.13.3</version> </dependency>2.手动装配redis
package com.example.springboot1.confing; import com.fasterxml.jackson.annotation.JsonAutoDetect; import com.fasterxml.jackson.annotation.PropertyAccessor; import com.fasterxml.jackson.databind.ObjectMapper; import lombok.extern.slf4j.Slf4j; import org.springframework.boot.context.properties.ConfigurationProperties; import org.springframework.cache.CacheManager; import org.springframework.context.annotation.Bean; import org.springframework.context.annotation.Configuration; import org.springframework.data.redis.cache.RedisCacheConfiguration; import org.springframework.data.redis.cache.RedisCacheManager; import org.springframework.data.redis.connection.RedisConnectionFactory; import org.springframework.data.redis.core.RedisTemplate; import org.springframework.data.redis.serializer.Jackson2JsonRedisSerializer; import org.springframework.data.redis.serializer.RedisSerializationContext; import org.springframework.data.redis.serializer.RedisSerializer; import org.springframework.data.redis.serializer.StringRedisSerializer; import java.time.Duration; /** * 配置rdeis 中的数据是 json 加入保存 */ @Configuration @ConfigurationProperties(prefix = "spring.cache.redis") @Slf4j public class RedisCacheConfig { private Duration timeToLive = Duration.ZERO; public void setTimeToLive(Duration timeToLive) { this.timeToLive = timeToLive; } @Bean public RedisTemplate<String, Object> redisTemplate(RedisConnectionFactory connectionFactory) { // 创建redisTemplate RedisTemplate<String, Object> redisTemplate = new RedisTemplate<>(); redisTemplate.setConnectionFactory(connectionFactory); // 使用Jackson2JsonRedisSerialize替换默认序列化 Jackson2JsonRedisSerializer jackson2JsonRedisSerializer = new Jackson2JsonRedisSerializer(Object.class); ObjectMapper objectMapper = new ObjectMapper(); objectMapper.setVisibility(PropertyAccessor.ALL, JsonAutoDetect.Visibility.ANY); objectMapper.enableDefaultTyping(ObjectMapper.DefaultTyping.NON_FINAL); jackson2JsonRedisSerializer.setObjectMapper(objectMapper); // key采用String的序列化方式 redisTemplate.setKeySerializer(new StringRedisSerializer()); // value序列化方式采用jackson redisTemplate.setValueSerializer(jackson2JsonRedisSerializer); // hash的key也采用String的序列化方式 redisTemplate.setHashKeySerializer(new StringRedisSerializer()); // hash的value序列化方式采用jackson redisTemplate.setHashValueSerializer(jackson2JsonRedisSerializer); redisTemplate.afterPropertiesSet(); return redisTemplate; } @Bean public CacheManager cacheManager(RedisConnectionFactory factory) { RedisSerializer<String> redisSerializer = new StringRedisSerializer(); Jackson2JsonRedisSerializer jackson2JsonRedisSerializer = new Jackson2JsonRedisSerializer(Object.class); //解决查询缓存转换异常的问题 ObjectMapper om = new ObjectMapper(); om.setVisibility(PropertyAccessor.ALL, JsonAutoDetect.Visibility.ANY); om.enableDefaultTyping(ObjectMapper.DefaultTyping.NON_FINAL); jackson2JsonRedisSerializer.setObjectMapper(om); // 配置序列化(解决乱码的问题) RedisCacheConfiguration config = RedisCacheConfiguration.defaultCacheConfig() .entryTtl(timeToLive) .serializeKeysWith(RedisSerializationContext.SerializationPair.fromSerializer(redisSerializer)) .serializeValuesWith(RedisSerializationContext.SerializationPair.fromSerializer(jackson2JsonRedisSerializer)) .disableCachingNullValues(); RedisCacheManager cacheManager = RedisCacheManager.builder(factory) .cacheDefaults(config) .build(); return cacheManager; } }热门文章
- 开宠物店利润大吗知乎(开宠物店利润大吗知乎)
- 猫三联疫苗多少钱一针?(猫三联疫苗要打几针 多少钱一次)
- 香港VPN | 2月19日20.3M/S|免费SSR/V2ray/Clash/Shadowrocket免费节点订阅分享
- React中事件的写法总结
- 香港VPN | 2月21日22.7M/S|免费Shadowrocket/Clash/SSR/V2ray免费节点订阅分享
- 炒玉米笋的做法窍门(炒玉米笋的做法视频)
- 宠物粮品牌排行前十(宠物粮食品牌排名)
- 被猫抓了十天后猫没死人安全吗(被猫抓了十天后猫没死人安全吗会死吗)
- 香港VPN | 2月23日19M/S|免费Clash/V2ray/Shadowrocket/SSR免费节点订阅分享
- 香港VPN | 2月25日19.6M/S|免费V2ray/Shadowrocket/Clash/SSR免费节点订阅分享
归纳
-
27 2025-02